|
How many
times have you had the need for a lumber stack at a sawmill, lumber
yard, on a delivery truck, sitting on a ramp ready to be shipped, on a
flatcar, or in a boxcar?Your first thought is, of course, "That
would sure take up a lot of expensive scale wood." Here is the
answer to that problem! Look around at the coffee shops you
frequent and find one that uses the wooden sticks to stir the coffee.
Somehow convince them that you need a box of sticks and you'll have
enough rough-cut lumber to satisfy all your lumbering requirements from
now on.
A
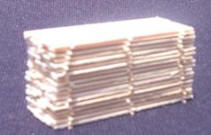
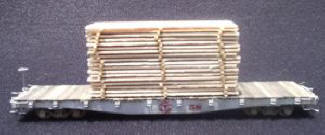
picture of the stirring sticks is depicted here, but the finished
product appears in photos I took of the sawmill modeling I did at the
Texas Western Model Railroad Club in Fort Worth Texas.

Your first
job is to cut these sticks to scale length. Cut each stick in
half, making a rough board approximately 20 feet long. In HO
scale, my stirring sticks ended up being about 18 inches wide and 3 to 4
inches thick. Since sawmills cut boards as big and as long as they
can, this wood will look good and represent the prototype. Next, I
take some 1/32" x 1/32" basswood (or balsa wood) and cut it into
scale lengths of 8 feet. These would be my layer separators to
help with the stacking and drying. I use 3 or 4 of the separators
per layer. I am not sure if there is a rule to this or not but 4
looks great.
Now that you
have all the wood cut, get some white glue (school glue) and start the
stacking. Start off with 4 equally spaced separators that set on
the ground and then add a row of boards. Try and keep a little
space between each board as you place it next to the other board so that
they are not tight together. This adds to the realism. After
that layer is complete, put on another set of 4 separators using the
last set of separators as a guide so they all line up vertically.
Now, add the next row of boards keeping the ends of your boards almost
even. Let some boards stick out or get pushed in a little so it
doesn't look like a solid block.
Build your
stacks up that way until you reach about 4 to 5 feet high. Cap the
stack with a row of rough-cut boards. Let it dry completely, and then
start placing them where you want them. You can glue some short
separators or even full length ones on top at random angles like they
were just tossed on the top of the stack by the yard workers. That
adds more variety.
Adding Bark
Since most
lumber at a mill is still rough-cut by the head saws, it needs bark on
the edges, Remember we are working in a small scale, which is to our
advantage here. Just take a brown and black felt tip marker and
color the long edge of these boards before you make the stacks.
This will add variety to your stacks and give it a purpose for being in
the drying area prior to going to the planner's shed for finishing.
Grading Colors
These colors
will vary but are generally green, blue, red, orange, and sometimes
yellow. I am not sure what each grade color is. You can
color code the ends of the lumber stacks with a felt tip pen once the
glue is dry. If you really want to get fancy, you can add some
black markings like spray-painted or stenciled labels or markings.
Sierra Scale Models
also offers pre-assembled wood stacks (see below) for $9.99.


Stack of Rough Lumber - $9.99.
Click
ARTICLES to read other techniques for model railroading. |